
Every day we run into slow PCs, which go very hard, respond hard to commands, fortunately, there are some little tricks to improve the life of the PC, as is the most common Restart. But there are other possibilities.
If you are a Windows user, then you may have noticed that the operating system deserves a reputation for affecting your computer’s performance. However, with the latest Windows 10, the slow performance of the hard drive is not as persistent as in previous versions of Windows. But that doesn’t mean the problem doesn’t exist.
1. Windows Device Manager
Now, if you have been exploring your Windows PC, then the name Device Manager should not be strange to you. Device Manager can be used to increase the read and write speed of a drive. Enabling write caching in Device Manager allows your computer to save data to a cache before transferring it to your hard disk. Saving cached data is much faster for the CPU than saving it to a hard drive. As a result, hard drive performance also improves.
- Use the Win + X shortcut to open a quick menu.
- Select “Device Manager”.
- Search for “Disk Drive” and click the side arrow.
- Select the unit you want to modify and right-click on it.
- Choose “Properties” from the pop-up menu.
- Select the “Policies” tab at the top of the “Properties” window.
- Make sure the “Enable cache on device” checkbox is selected.
2. Windows Disk Management
Windows Disk Management is another built-in Windows 10 tool that you can use to increase hard disk performance. Instead of caching your data as in Device Manager, Disk Management helps you partition your drive again. Disk drive partitioning makes it easier for Windows 10 to locate certain data, reducing the load time on your drive.
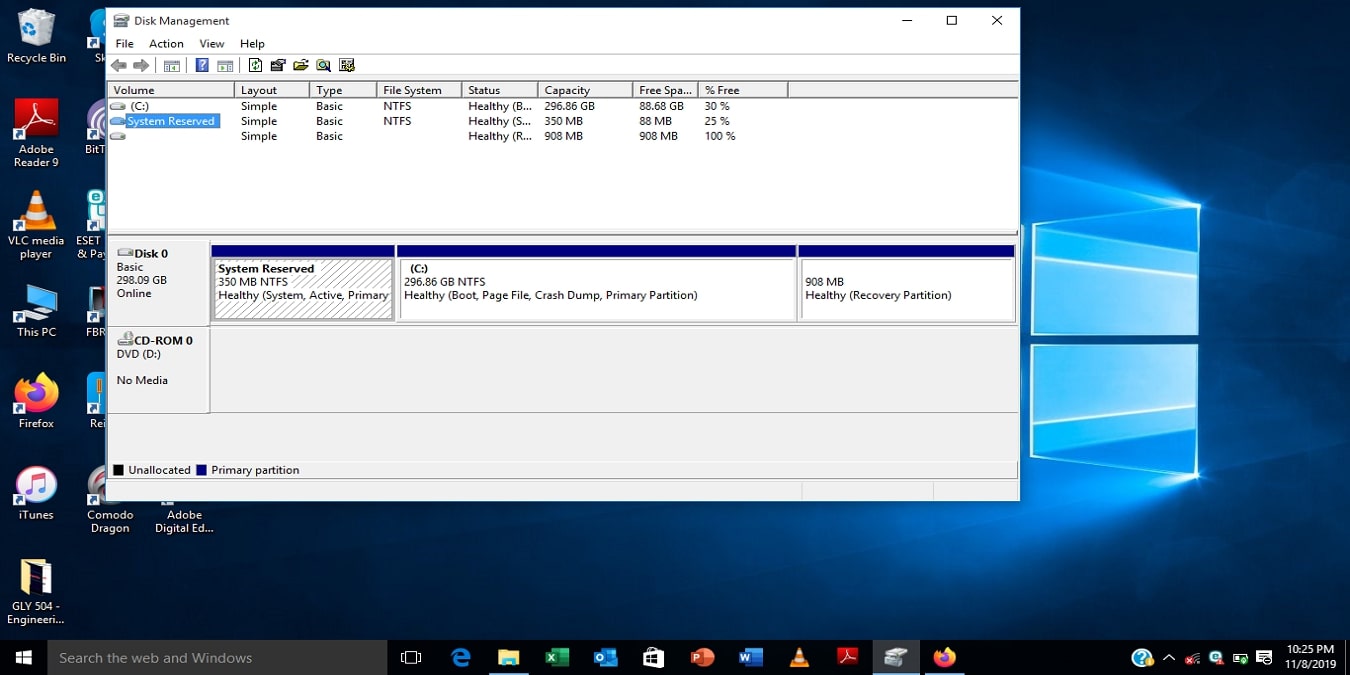
- Use the Win + X shortcut to open a quick menu.
- Select “Disk Management”.
- Search for “Disk Drive”.
- Select the unit you want to modify and right-click on it.
- Choose “Shrink Volume” from the pop-up menu.
- Right-click the free space again and select “New Simple Volume”.
- Select the size for the new volume.
- Choose the file system for the new volume and close the window.
- Go to “File Explorer” and check “This PC” or your computer name is saved as on the desktop. You will see the new volume.
3. Optimize Windows drives
The latest native Windows 10 tool that can improve your hard drive performance is “Optimize your drives.” What this tool does is analyze your system for issues such as defragmentation. If the analysis highlights a problem, then the tool solves it as well.
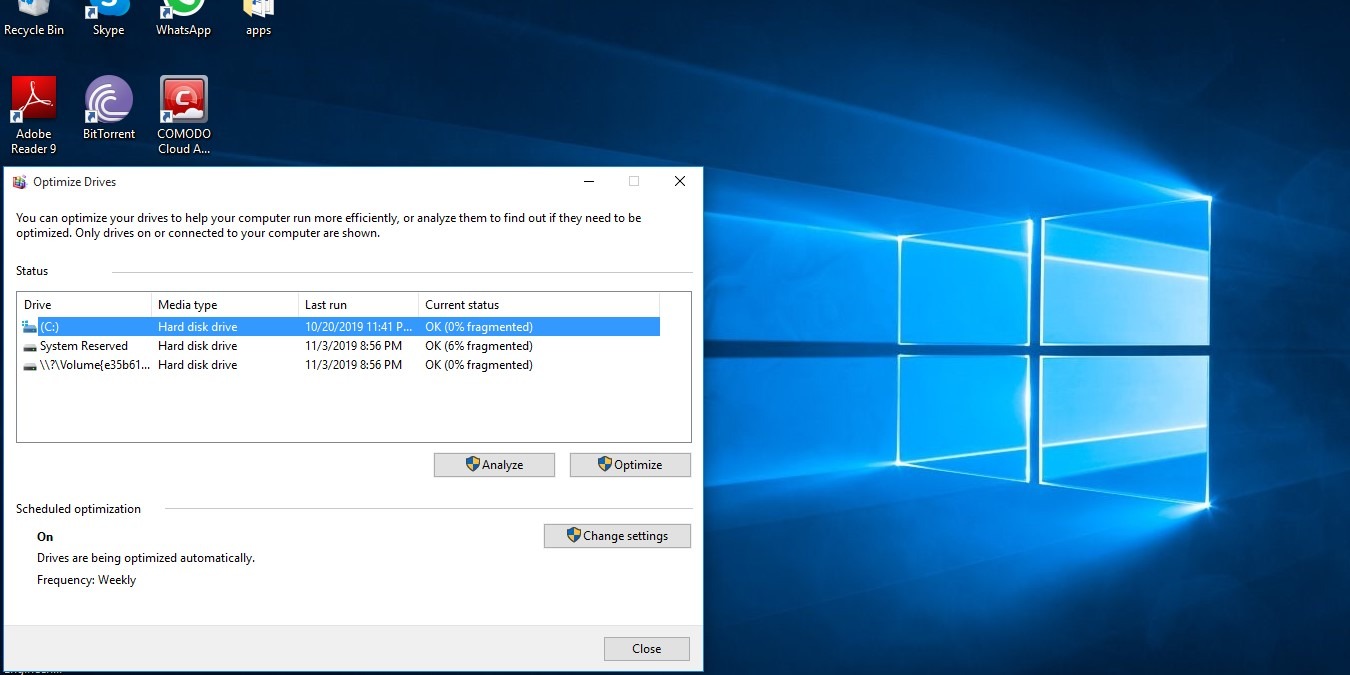
Most often, the tool runs automatically on your computer. The only situation that won’t work is if you’ve changed a Windows setting. Here’s how to check:
- Launch the “Windows Search” tool.
- Type “Administration Tools”.
- Select “Defragment and optimize drives.”
- When the “Optimize Drives” window launches, select the drive you want to “Analyse” or “Optimize.”
- Check the bottom of the window to see if the unit is optimized daily, weekly, or never.
- Go to “Change settings” to adjust the drive optimization program.
EaseeControl, for example, lets you click a single icon to get the system-cleaning process started. Windows 10 lacks the one-click, tune-up button that EaseeControl uses to quickly clean up your PC. Install and download it for FREE and see for yourself what you can do with World’s unique self-driving app for Windows 10 users.